
Creating a Plant Mod
In this guide we’ll detail how to create a new plant item in Two Point Museum, it will involve changing the mesh of an existing plant with one that you’ve made yourself.
To start with you will however need to have followed our initial modding setup guide. We also recommend that you follow our guide on creating a mural item mod first (as that process is slightly simpler).
Step 1: Clear Addressable Groups
To simplify some of the later steps, first we’ll want to clear down the Addressable Groups in the Unity project. Don’t worry if this doesn’t make much sense yet!
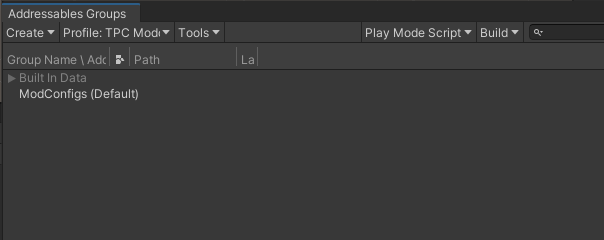
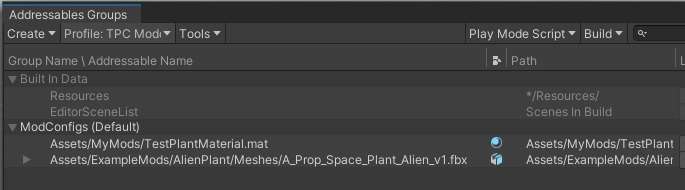
Navigate to Window -> Asset Management -> Addressables -> Groups, then in here we basically want to delete everything so we’re only left with the greyed-out ‘Built In Data‘ group and an empty ‘ModConfigs (Default)‘ group as shown below (just select the other groups and press the Delete key on your keyboard to remove them, and then remove any files individually that remain in the ModConfigs group):
Step 2: Create Your Item Mod Config
The first thing you’ll need to do is create a new Item Mod Config. This is the file that describes everything about your item mod (including specifying which item you’re basing your mod on, what it’s going to look like, how much it costs in-game etc).
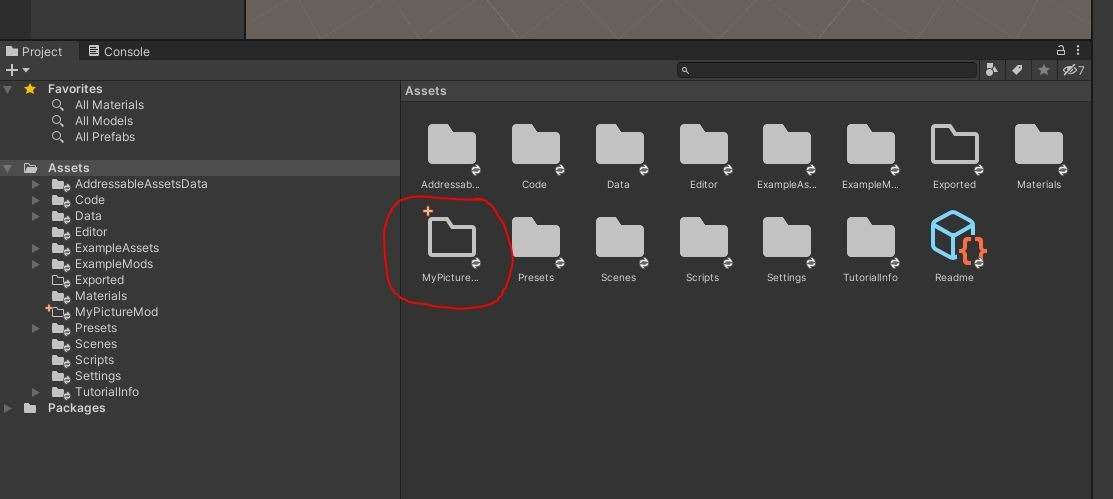
To do this let’s create a new directory in the Assets folder of the project for our mod to live in, select the Assets folder in the project view in Unity and then Right Click -> Create -> Folder and name it MyPlantMod:
Next we’ll create our Item Mod Config in our new folder. Open the folder we just created, then in the same window Right Click -> Create -> TPS -> Config -> ItemModConfig.
Name this MyPlantModConfig (or whatever you like) and then select it. You should now see an Inspector on the right showing your currently empty mod config:
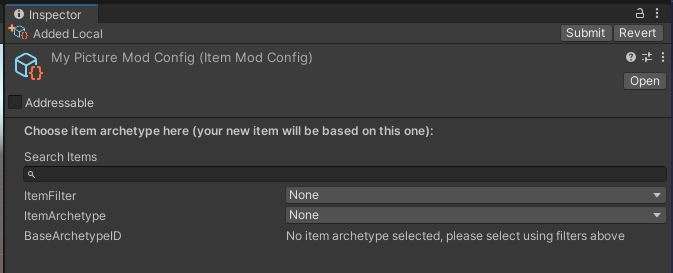
Please ensure that the ‘Addressable’ box is checked, otherwise you won’t be able to see your mod in-game.
Step 3: Choose an Item to Mod
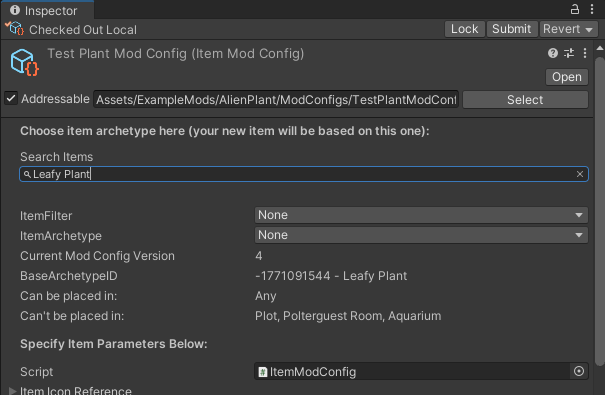
This time we’re creating a mod of a plant, so type Leafy Plant in the search box and select that item to mod. The inspector should now transform to reflect that this is the item you’re now modding:
Step 4: Give Your Item a Name and Description
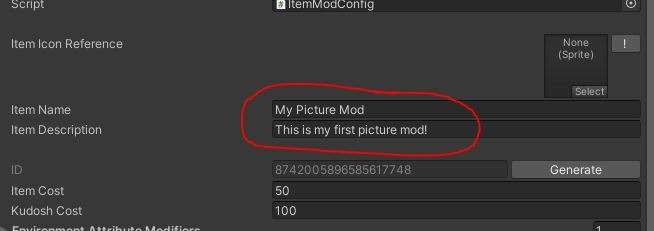
As you can see there are a lot of things we can modify here. For the sake of this mod let’s just enter our own Item Name and Item Description:
Step 5: Provide a Texture and Mesh
Next we’ll want to import both a texture and a mesh to use for our plant. For the sake of this tutorial we can just use the example Alien Plant mesh and texture that are already in the modding project (you can find these in the ExampleMods/AlienPlant/Meshes and ExampleMods/AlienPlant/Textures directories).
Alternatively you can use your own mesh, it will need to be in the .FBX format. If you’re using Blender you can follow our guide to importing a mesh from Blender here, some of the advice there (particularly the import settings) is relevant to other modelling software as well.
We normally use the .TGA format for textures, but a .PNG will work too.
If you’d like to take a look at the original game assets for reference (e.g. to ensure your mesh is a similar size), then you can refer to the Extracting the original game assets for reference section of our more in-depth modding guide here.
One common gotcha is that meshes export 100x smaller when extracted from the base game in this way, so you may need to scale your mesh up in your chosen modelling software prior to exporting.
Once you have a texture and a mesh, you just need to drag them into the directory of your choosing in the modding project and Unity will automatically import them for you.
Step 6: Create a Material
Once you have your texture and mesh imported into Unity, next you’ll need to create a material for your mesh. A material basically describes how your mesh will be rendered in-game, it will tell the game which texture to use as well as which shader to use and the parameters to set (such as how shiny it should appear etc).
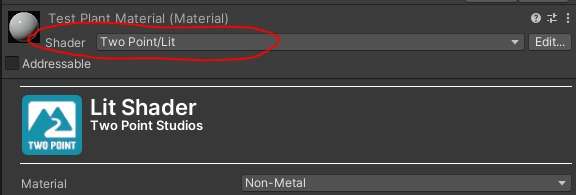
In Unity right click in a directory and select Create -> Material to create the material. Select your new material and in the inspector on the right use the drop-down menu at the top to select the Two Point -> Lit shader:
Note: Sometimes the Two Point shaders in the modding project appear under “Failed to compile”. You are still able to use the shader without any issues.
Then you’ll want to assign your texture to this material, for now keep everything else as the default values and drag your texture into the Albedo parameter in the material.
If you have normal and specular textures for your mesh you can also drag these into the Normal and Smoothness parameters. Also ensure Enable GPU Instancing is ticked at the bottom.

Note: Textures do not need to be marked as addressable.
Step 7: Hook Up Our New Material and Mesh to Our Item Mod Config
First navigate to your mesh in Unity and select it, then in the inspector check the Addressable tick box in the top left just like we did for our material.
Now select the Item Mod Config that we made earlier, and scroll down in the inspector on the right to find the Meshes section. Here you should see a list that contains three entries, Plant_Lillies LOD0, LOD1 and LOD2. These are all the same mesh, but at three different levels of complexity that are drawn depending on how small the item appears on screen (LOD stands for Level Of Detail).
In most cases you won’t need to worry about making three different meshes with different poly counts, we can just happily drag our new mesh into all three entries. Here we can also expand the Materials list for each entry by one, and then drag our new material into all three.
Any meshes you don’t override or opt to be hidden here will still appear in-game as their old mesh, this can be desirable (in this case, we still want the plant pot to appear). You should end up with your Meshes section looking something like this:

Step 8: Prepare to Export
From the menu at the top select Window -> Asset Management -> Addressables -> Groups. Expand each of the groups in the list and you should see something like this:
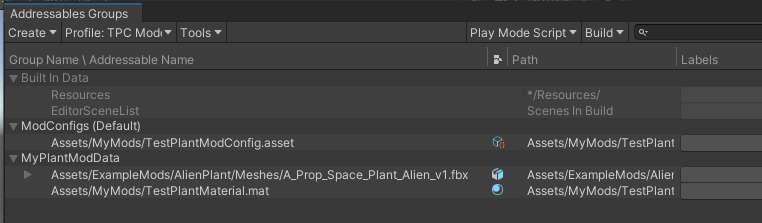
Now right click in this window and select Create Group -> Packed Assets. A new group should appear, rename this group to MyPlantModData. Next drag your Item Mod Config into the ModConfigs group, and then your material and mesh from the ModConfigs (Default) group into the MyPlantModData group. We want these to be separate so the game knows only to load the data for your mod when needed, whereas the mod configs remain loaded all the time. Everything should now look like this:
Step 9: Export Your Mod then Test In-game!
We’re almost done! In Windows Explorer navigate to the Assets/Exported~ directory of the project (if it exists, if you’ve never exported a mod before then it may not exist yet which is fine) and ensure the directory is completely empty. This is where our mod files will be exported to, it’s important that you empty this directory each time you export a mod.
Now back in Unity, go back to the Addressables Groups menu (as above) and select Build -> New Build -> Two Point Modding Build Script.
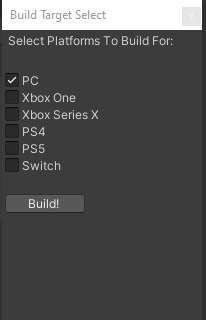
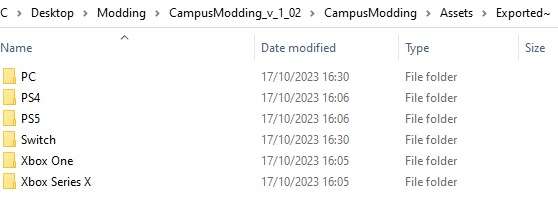
From here you can toggle which platforms you’d like your mod to be used on. For now only PC is supported (note that PC covers Mac and Linux as well). The ‘Exported~‘ folder will separate the mods into their own platform based folders.
Next, you’ll want to copy all these files from the PC folder into the staging directory for mods in Two Point Museum. This can be found in your AppData directory (normally C:\Users\YOUR USERNAME\AppData\LocalLow\Two Point Studios\Two Point Museum).
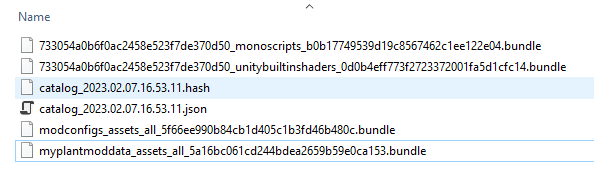
In this folder create a new folder called Mods if it doesn’t exist already, and within there a subfolder for your mod. Copy all the files from the Assets/Exported~ directory above into this new folder, It should look something like this:
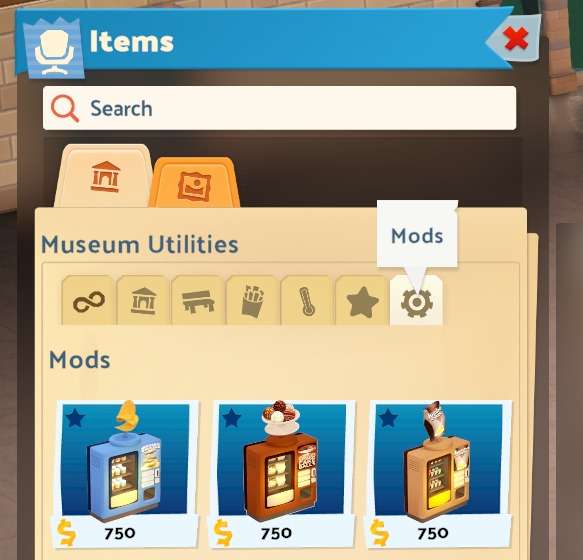
Now load up the game and your item should appear in the list! It will have the same icon as the Leafy Plant for now. You can find your modded items more easily in-game using the filters in the items menu; select the Mods tab at the end of the list (after the Favourites tab).
Alternatively you can start typing the name of your item in the Search bar at the top:
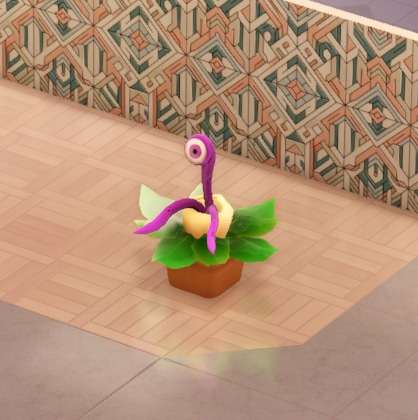
Here’s a screenshot of the end result in-game:


Be the first to comment