
Creating a Wallpaper Mod
In this guide we’ll detail how to create a new wallpaper mod, these mods involve changing how the walls look throughout your museum.
To start with you will however need to have followed our initial modding setup guide. Once you’ve followed that guide and have the Unity project all set up and running we can get started!
Step 1: Clear Addressable Groups
To simplify some of the later steps, first we’ll want to clear down the Addressable Groups in the Unity project. Don’t worry if this doesn’t make much sense yet!
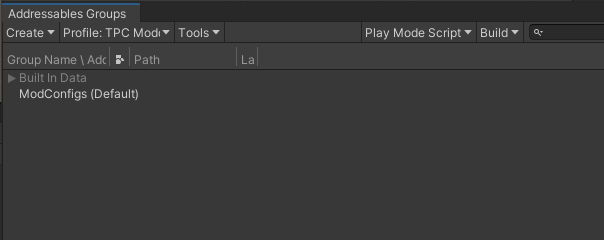
Navigate to Window -> Asset Management -> Addressables -> Groups, then in here we basically want to delete everything so we’re only left with the greyed-out ‘Built In Data‘ group and an empty ‘ModConfigs (Default)‘ group as shown below (just select the other groups and press the Delete key on your keyboard to remove them, and then remove any files individually that remain in the ModConfigs group):
Step 2: Create a Room Visual Mod Config
The first thing you’ll need to do is create a new Room Visual Mod Config. This is the file that describes everything about your room visual mod (including what it’s going to look like, how much it costs in-game etc).
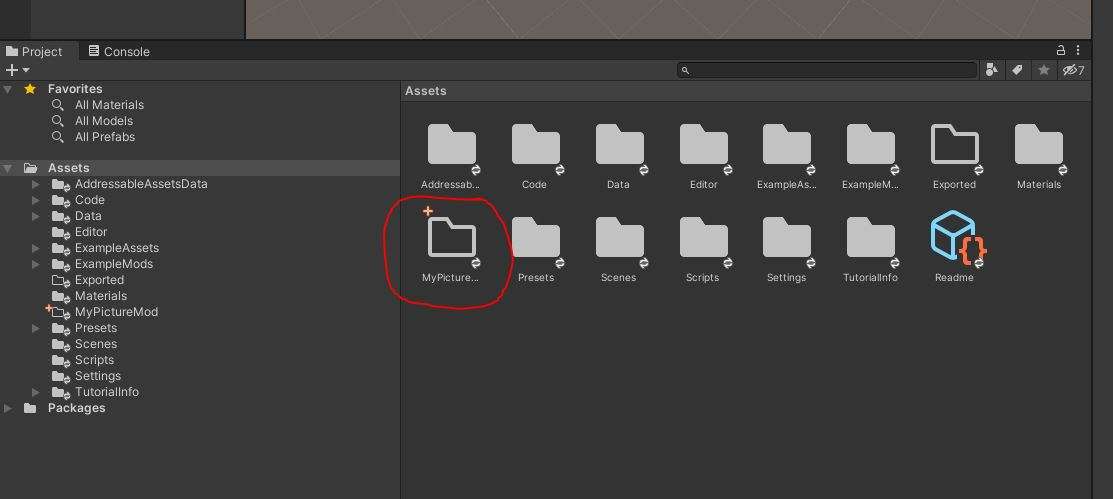
To do this let’s create a new directory in the Assets folder of the project for our mod to live in, select the Assets folder in the project view in Unity and then Right Click -> Create -> Folder and name it MyWallMod:
Next we’ll create our Room Visual Mod Config in our new folder. Open the folder we just created, then in the same window Right Click -> Create -> TPS -> Config -> RoomVisualModConfig.
Name this MyWallpaperModConfig (or whatever you like) and then select it. You should now see an Inspector on the right showing your currently empty mod config:
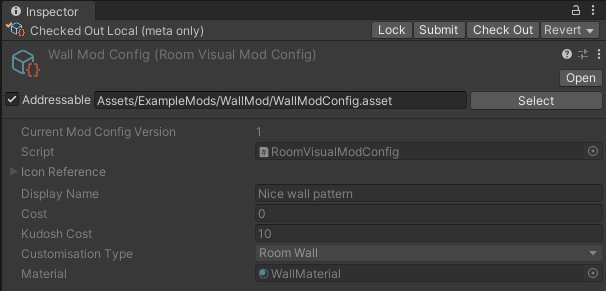
Please ensure that the ‘Addressable’ box is checked, otherwise you won’t be able to see your mod in-game.
Step 3: Choose the Customisation Type
For now, only Room Wall is available to pick here as the customisation type.
Step 4: Give Your Mod a Name
Enter the name you’d like to see displayed in the selection menus in the Display Name field above.
Step 5: Create a Material
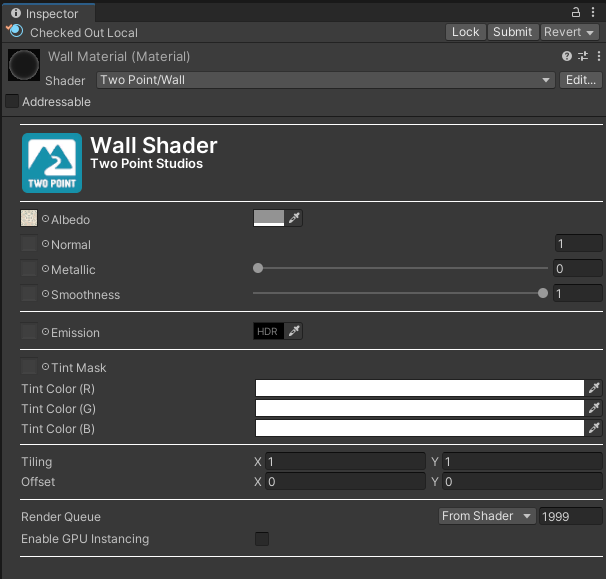
Next we’ll need to create a material for our mod. Right Click -> Create -> Material. We’ll need to ensure that the material is using the correct shader, for Floor mods you’ll need to use the Two Point/Floor shader and for Wall mods you’ll need to use the Two Point/Wall shader.
You can select the shader by clicking the drop down selection menu at the top of the material inspector (named Shader).
Note: Sometimes the Two Point shaders in the modding project appear under “Failed to compile”. You are still able to use the shader without any issues.
Step 6: Provide a Texture
Next you’ll want to provide your own texture to use for the mod. You can use almost any image you like, we recommend using a .PNG or similar. Once you’ve found one like (or made one yourself), take your image and simply drag and drop it into your mod’s folder in Unity. Alternatively for the sake of this tutorial you can just use the example Floor Mod’s texture in the ExampleMods/WallMod directory called pattern.
Once you have your texture imported into Unity, simply drag and drop your texture into the little Albedo box in the Material inspector (as in the screenshot from the previous step). You’ll probably want to ensure that the Metallic field is set to zero. You may also want to make the albedo colour slightly grey rather than white (as often images can appear brighter than expected when in-game), but you can experiment with this.
Step 7: Hook Up Material to Mod Config
Now that you’ve made your material, select your Room Visual Mod Config and then drag your new material into the Material field.
Step 8: Export Your Mod
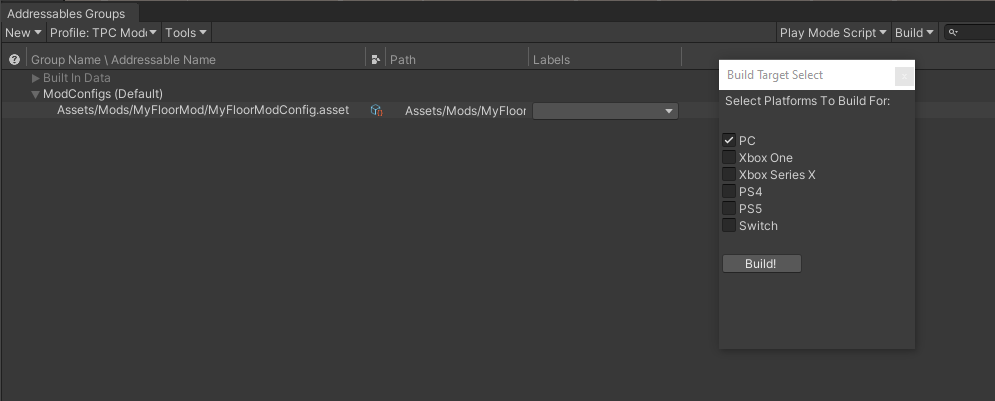
You should now be ready to export your mod! For this example you should only need your mod config in the addressables groups (as per the screenshot below). Once you’ve confirmed that’s the case, also ensure you’ve emptied the Exported~ directory in your MuseumModding/Assets directory before continuing.
Once that’s all sorted, simply select Build -> New Build -> Two Point Modding Build Script. You should now be presented with a dialog that will prompt you to select which platforms you’d like to export for, for now just ensure that PC is ticked and click Build!
Next, you’ll want to copy all these files from the PC folder into the staging directory for mods in Two Point Campus. This can be found in your AppData directory (normally C:\Users\YOUR USERNAME\AppData\LocalLow\Two Point Studios\Two Point Museum).
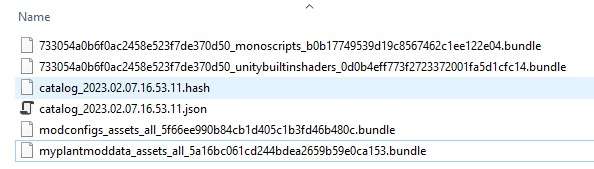
In this folder create a new folder called Mods if it doesn’t exist already, and within there a subfolder for your mod. Copy all the files from the Assets/Exported~ directory above into this new folder, It should look something like this:
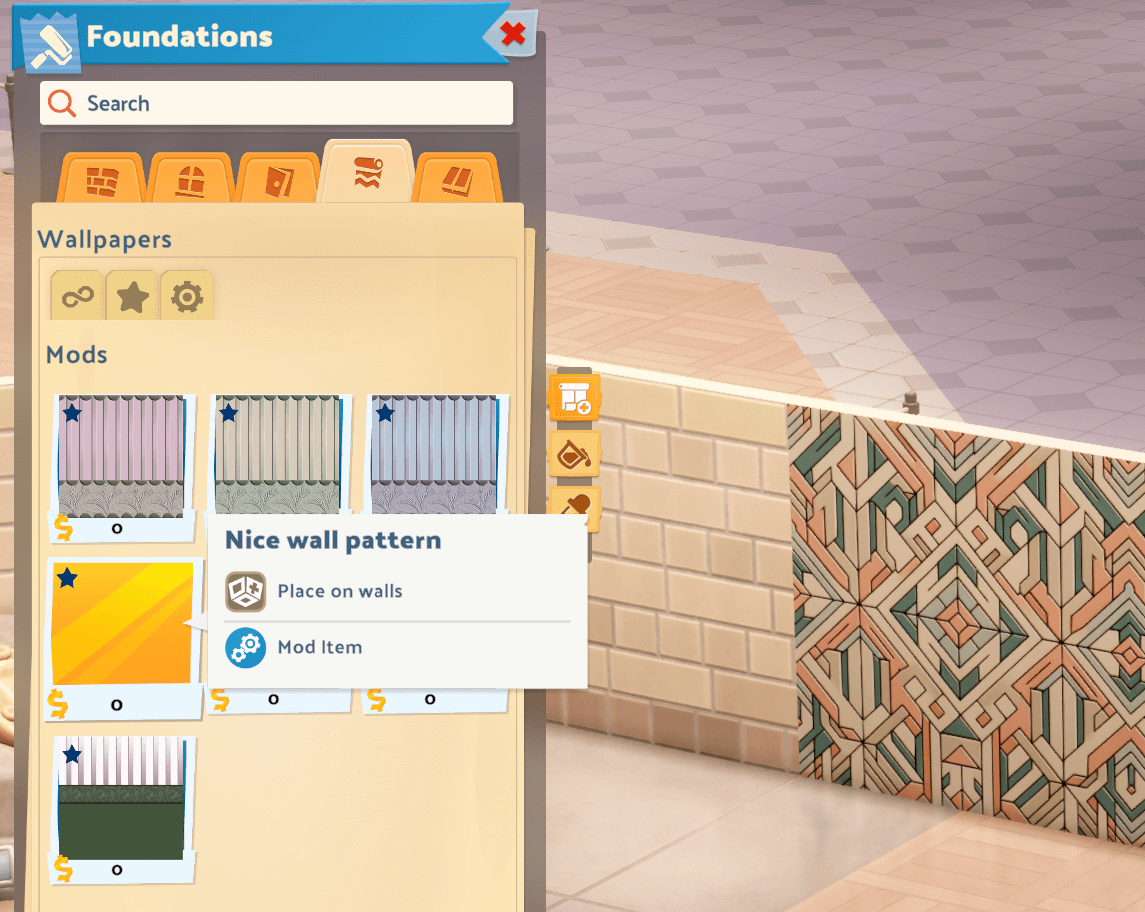
Now load up the game and your new floor mod should appear in the list! You can use the search bar at the top to find your mod easier by name, or you can use the cog icon filter to only show modded items in the list.

Be the first to comment