
Importing Meshes from Blender
In this guide we’re going to cover the process for exporting a mesh as a .fbx from Blender, and then importing that .fbx file into Unity for use in Two Point Campus as a mod.
We’re going to assume that you already have a mesh in Blender that you’ve either made yourself or imported from elsewhere, and that you’re ready to try and bring that mesh into the Two Point Museum modding project. If you haven’t yet got set up with the modding project, we recommend you visit our Initial Modding Setup Guide and then our Guide on Making an Item Mod.
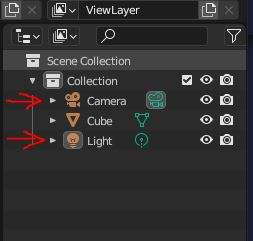
Remove Unnecessary Objects
Before exporting a mesh from Blender we recommend removing any unnecessary objects (this include any lights or cameras). If you really want them there because they’re part of your workflow, then be sure to only select your actual mesh when exporting and select only to export Selected Objects (we’ll cover this later):
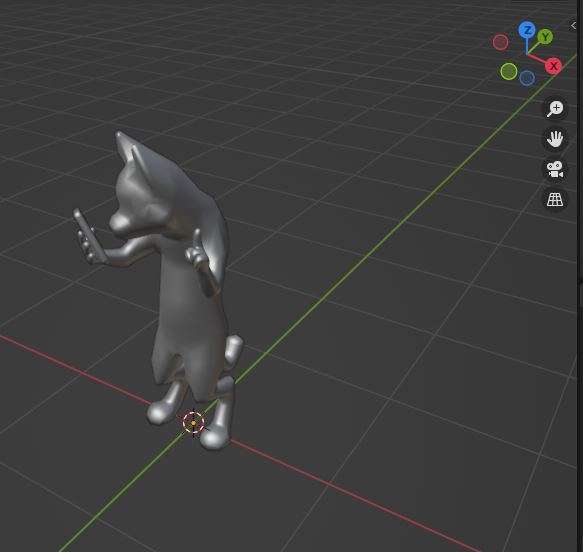
Mesh Orientation
First you’ll want to ensure that your mesh has the correct orientation in Blender itself. You’ll want your mesh to be pointing along the negative Y axis, with its feet firmly planted at the 0,0,0 coordinates (if your mesh falls below this, it will clip through the floor in-game).
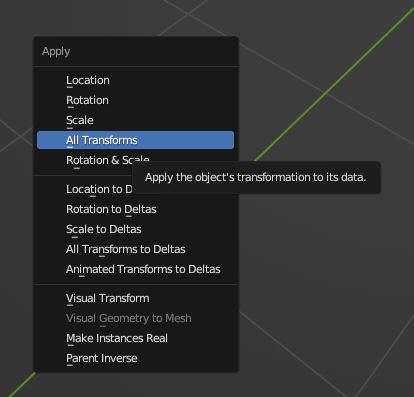
Mesh Transforms
Next you’ll need to ensure that all the transforms are reset to default (translations and rotations set to 0 and scales set to 1) for your mesh, while maintaining your desired scale and orientation. To do this in Blender hit Ctrl-A to bring up the Apply menu and select All Transforms.
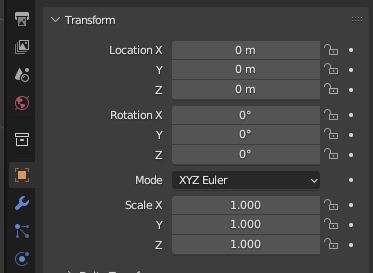
After selecting this the transforms on the right for your mesh should now look like this:
Note: Try deselecting your meshes and seeing if there is still some rotation or other transform there, if so then repeat the above (without your mesh selected and/or with everything in your scene selected just to make sure).
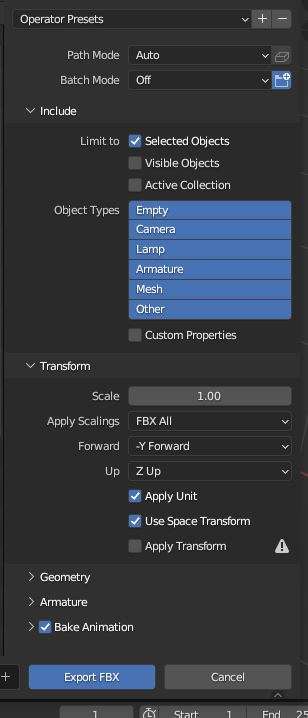
Export to FBX
We should now be ready to export our mesh to a .fbx file. First ensure that only your mesh is currently selected in your scene, then select File->Export->FBX (.fbx) and then observe the export settings. The following are important and should be set as follows:
Include Section:
- The Limit to checkboxes under the Include section should have Selected Objects enabled. Alternatively you could use some other method to limit what’s exported, such as having the Object Types set only to Mesh.
Transform section:
- Scale should be set to 1.00
- Apply Scalings should be set to FBX All
- Forward should be set to -Y Forward (negative Y axis)
- Up should be set to Z Up
- Apply Unit should be enabled
- Use Space Transform should be enabled
- Apply Transform should be disabled
Once you’re ready and you’ve selected a location/filename for your .fbx file, hit Export FBX.
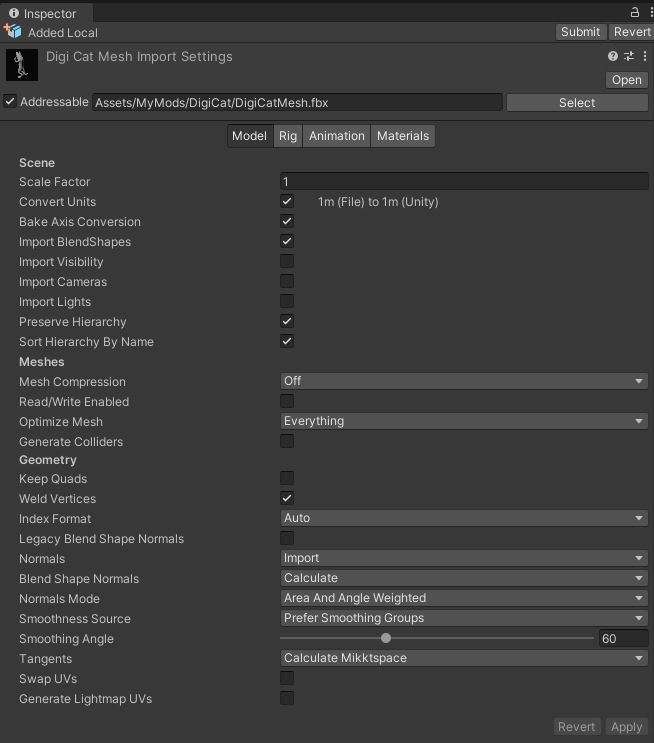
Import into Unity
Now that we have our .fbx file exported from Blender we can import it into our Unity project. Copy the file into the directory you’d like the mesh to live in within your project and Unity will import it automatically, once this is done we may need to adjust some of the Mesh Import Settings.
Select your imported mesh in Unity to bring up the import settings in the Inspector on the right. Most of the settings can probably be kept at their default values, the following are important to check though:
- Convert Units should be enabled
- Bake Axis Conversion should be enabled
- Importing of Visibility, Cameras and Lights should all be disabled
- Preserve Hierarchy should be enabled
Here are the import settings for our example mesh below:
Closing Notes
There are quite a number of ‘gotchas’ in this process, particularly when it comes to ensuring all your transforms are at their default values in Blender. Be sure to go back and double-check these and your export settings if you’re finding that your mesh is importing with an unexpected rotation or scale.
You can try dragging your mesh into an empty Unity scene to see if it looks okay (perhaps try dragging it in alongside one of the example mod meshes to compare). You may need to play about with the scale of your meshes in Blender to get them to appear at the correct size in-game.
When using Asset Studio to extract meshes from the base game and bring them into Blender note that the meshes will need to be scaled up 100x to have their correct size. You can use this method to compare the size of your mesh to those in the base game (Export from Asset Studio -> Import .OBJ file into Blender -> Scale up 100x -> Compare with your mesh).
For more details on extracting assets from the original game see the Extracting the original game assets section of our Modding Items How-To Guide.

Be the first to comment